
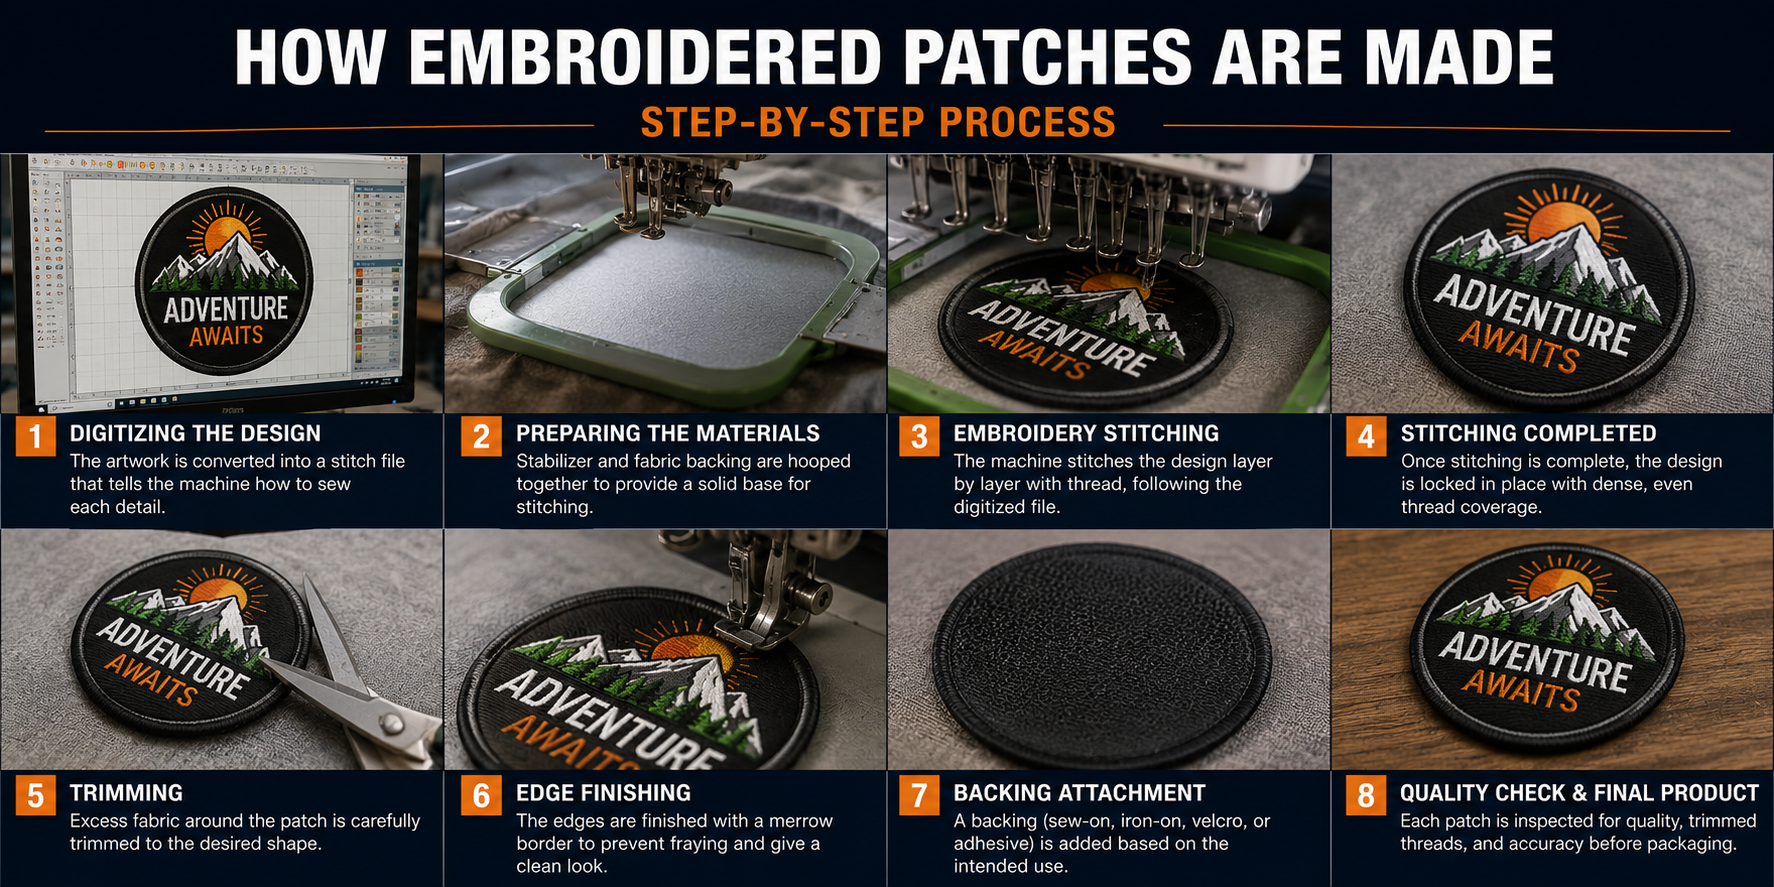
Making embroidered patches follows a clear sequence: prepare and digitize the design, hoop the fabric with stabilizer, stitch the design, trim and finish the edge, then attach backing. Each step directly affects the final patch's quality, so skipping stabilizer or rushing the trim usually shows up in the finished product. Testing your design on scrap fabric first is the single habit that prevents most common mistakes in this process.
Introduction
Embroidered patches go through a specific manufacturing sequence, from digitizing a design to stitching, trimming, and finishing. Skipping or rushing any step usually shows up in the final result. Here’s the full process, step by step.
Featured Snippet Answer
To make embroidered patches, digitize your design into a stitch file, hoop a stabilizer and fabric backing, run the embroidery machine to stitch the design, trim the excess fabric, finish the edge, then attach backing. Each step affects the final texture, durability, and how closely the patch matches your original design.
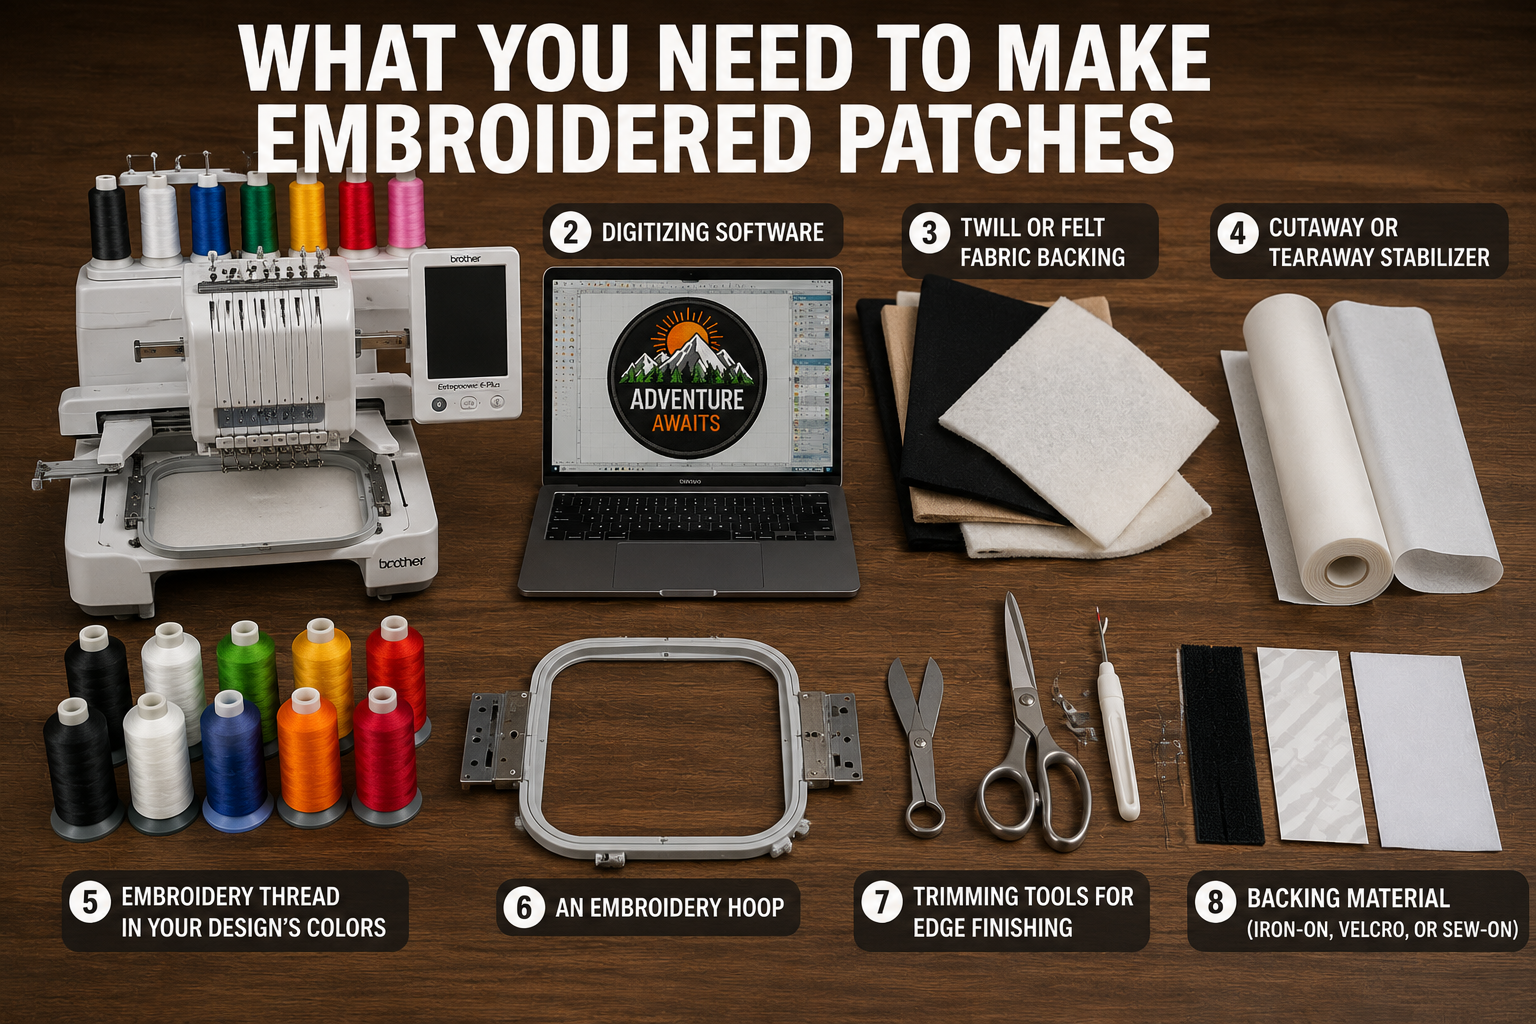
What You Need to Make Embroidered Patches
- An embroidery machine.
- Digitizing software.
- Twill or felt fabric backing.
- Cutaway or tearaway stabilizer.
- Embroidery thread in your design’s colors.
- An embroidery hoop.
- Trimming tools for edge finishing.
- Backing material (iron-on, Velcro, or sew-on).
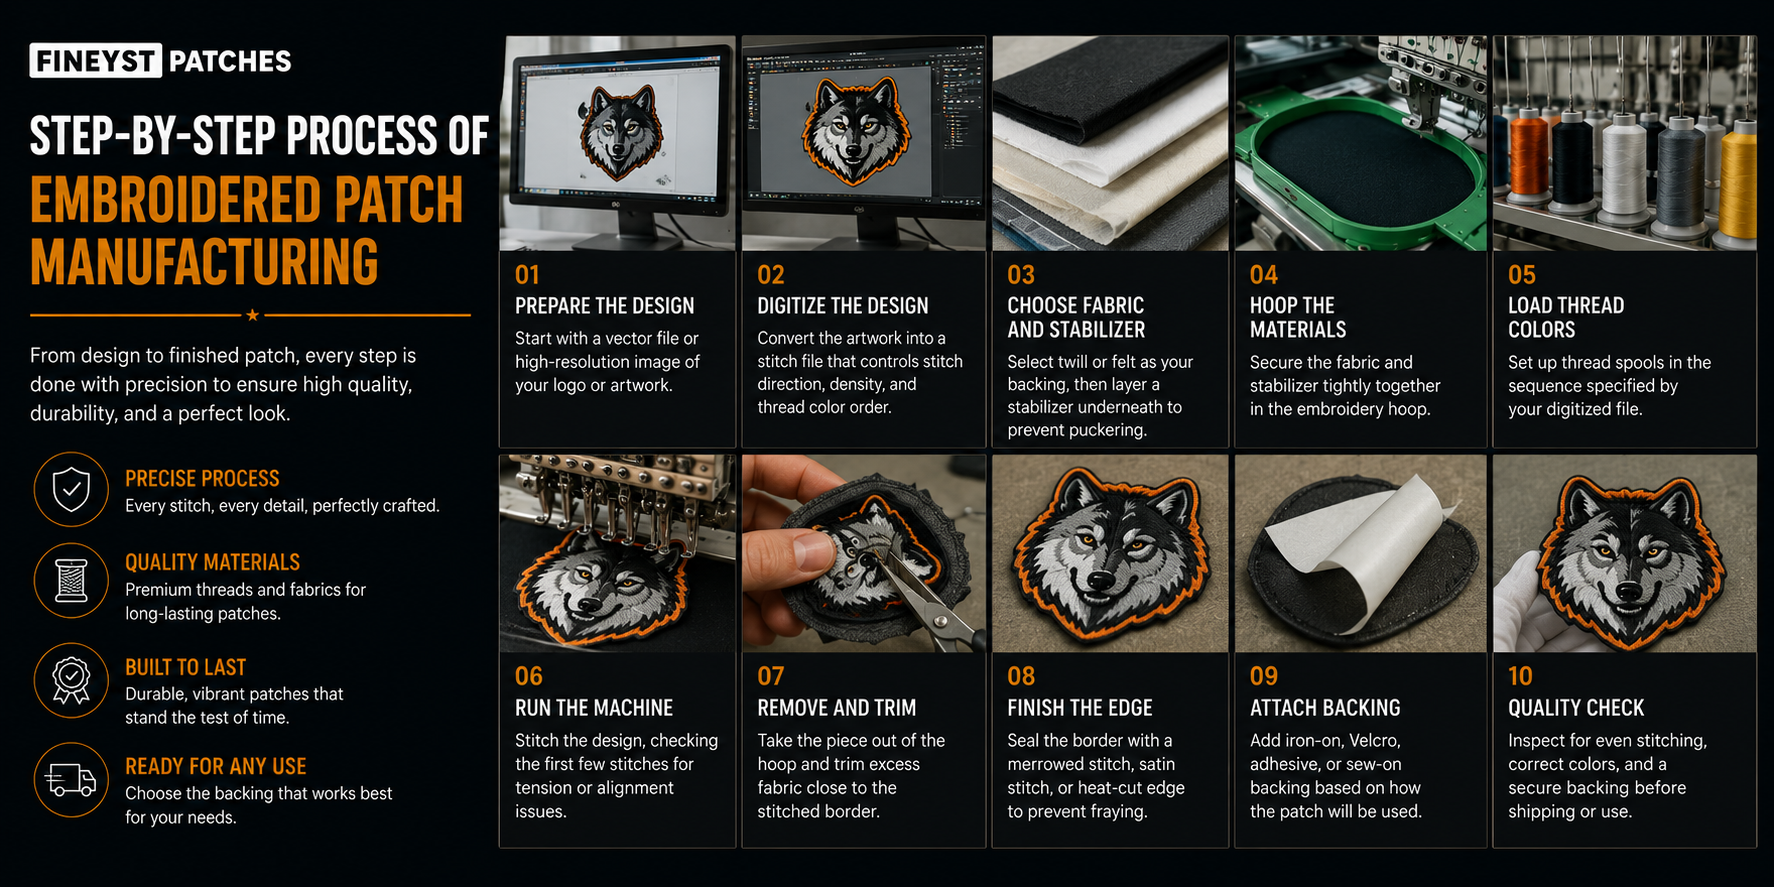
Step-by-Step Process of Embroidered Patch Manufacturing
- Step 1: Prepare the Design Start with a vector file or high-resolution image of your logo or artwork.
- Step 2: Digitize the Design Convert the artwork into a stitch file that controls stitch direction, density, and thread color order.
- Step 3: Choose Fabric and Stabilizer Select twill or felt as your backing, then layer a stabilizer underneath to prevent puckering.
- Step 4: Hoop the Materials Secure the fabric and stabilizer tightly together in the embroidery hoop.
- Step 5: Load Thread Colors Set up thread spools in the sequence specified by your digitized file.
- Step 6: Run the Machine Stitch the design, checking the first few stitches for tension or alignment issues.
- Step 7: Remove and Trim Take the piece out of the hoop and trim excess fabric close to the stitched border.
- Step 8: Finish the Edge Seal the border with a merrowed stitch, satin stitch, or heat-cut edge to prevent fraying.
- Step 9: Attach Backing Add iron-on, Velcro, adhesive, or sew-on backing based on how the patch will be used.
- Step 10: Quality Check Inspect for even stitching, correct colors, and a secure backing before shipping or use.
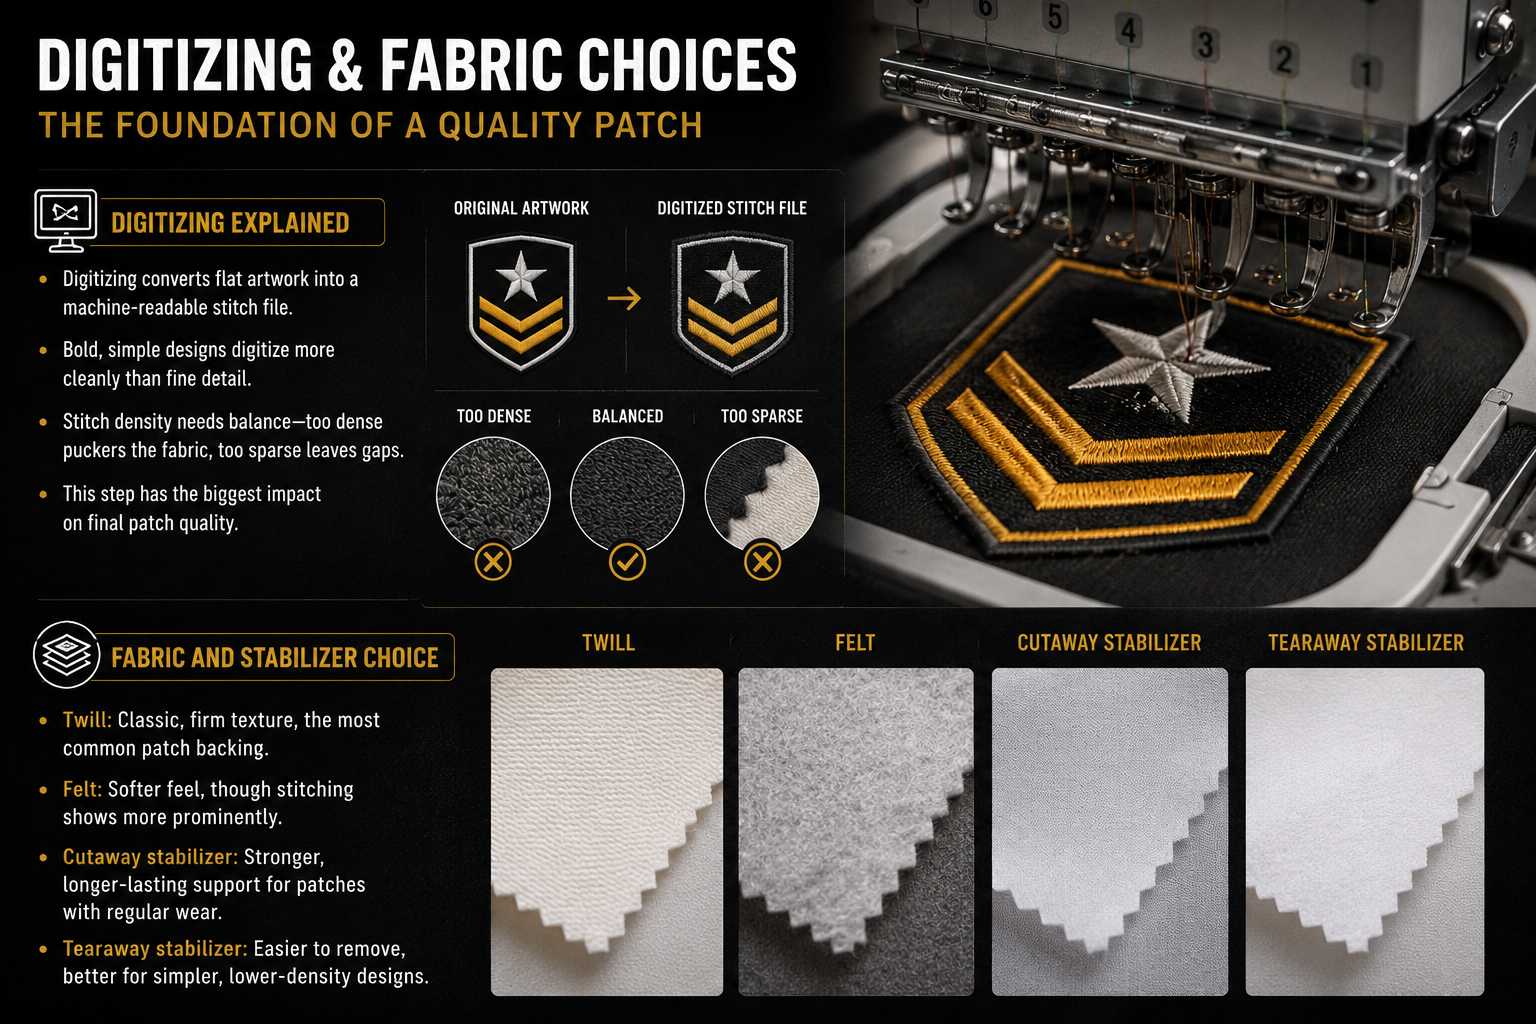
Digitizing Explained
- Digitizing converts flat artwork into a machine-readable stitch file.
- Bold, simple designs digitize more cleanly than fine detail.
- Stitch density needs balance too dense puckers the fabric, too sparse leaves gaps.
- This step has the biggest impact on final patch quality.
Fabric and Stabilizer Choice
- Twill: Classic, firm texture, the most common patch backing.
- Felt: Softer feel, though stitching shows more prominently.
- Cutaway stabilizer: Stronger, longer-lasting support for patches with regular wear.
- Tearaway stabilizer: Easier to remove, better for simpler, lower-density designs.
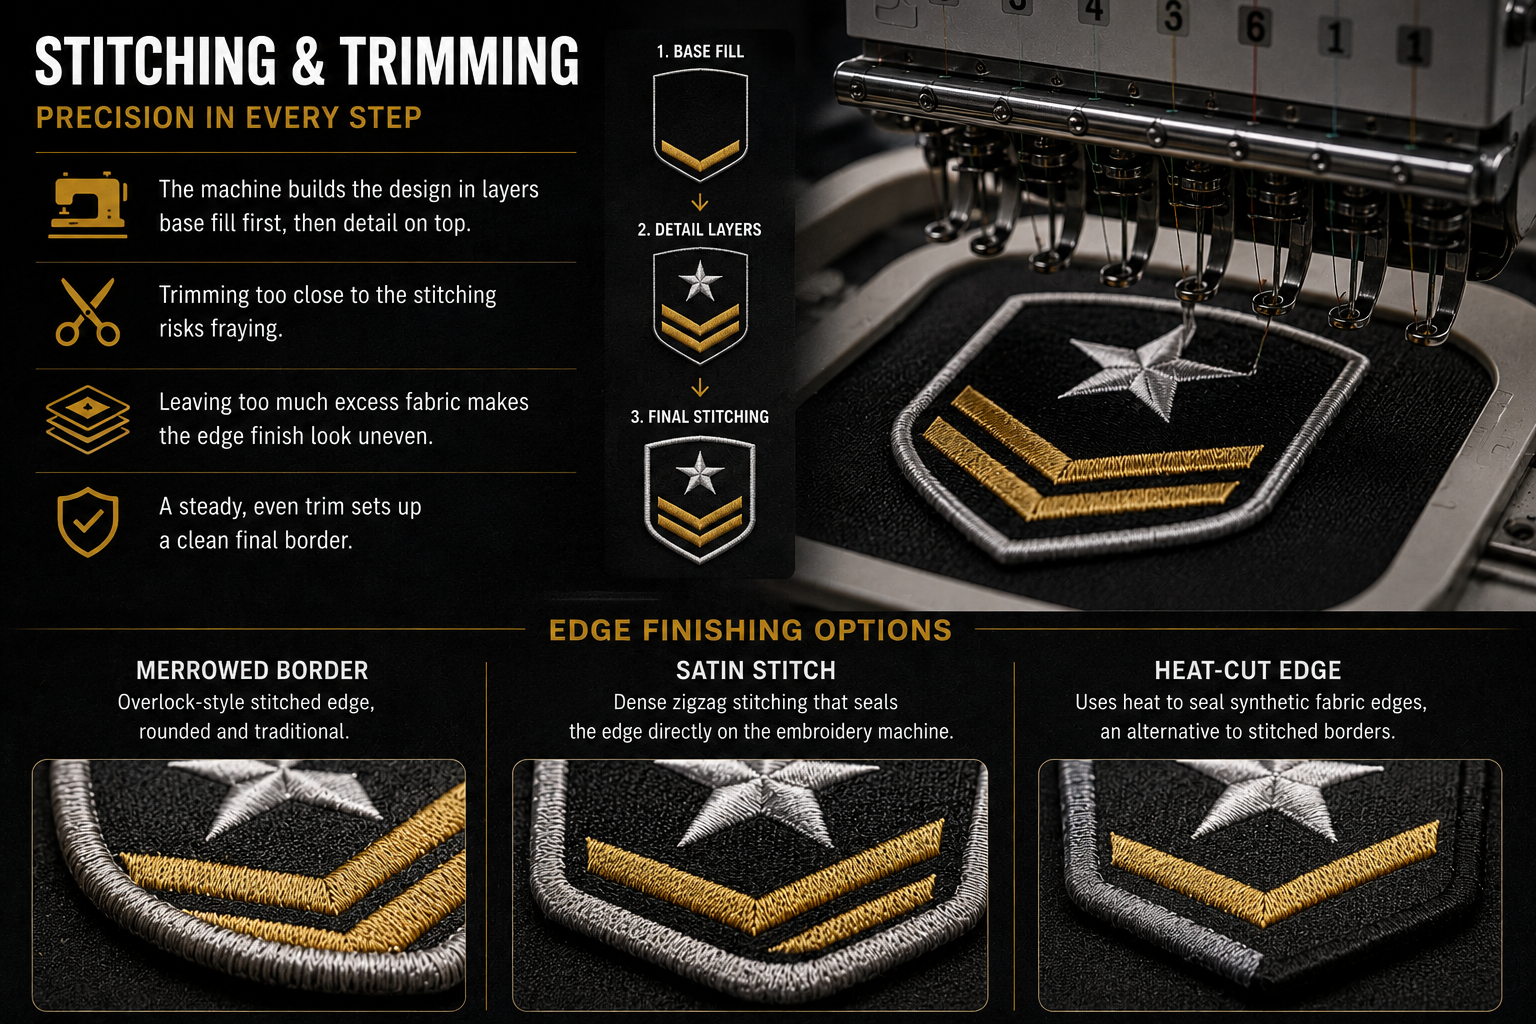
Stitching and Trimming
- The machine builds the design in layers base fill first, then detail on top.
- Trimming too close to the stitching risks fraying.
- Leaving too much excess fabric makes the edge finish look uneven.
- A steady, even trim sets up a clean final border.
Edge Finishing Options
- Merrowed border: Overlock-style stitched edge, rounded and traditional.
- Satin stitch: Dense zigzag stitching that seals the edge directly on the embroidery machine.
- Heat-cut edge: Uses heat to seal synthetic fabric edges, an alternative to stitched borders.
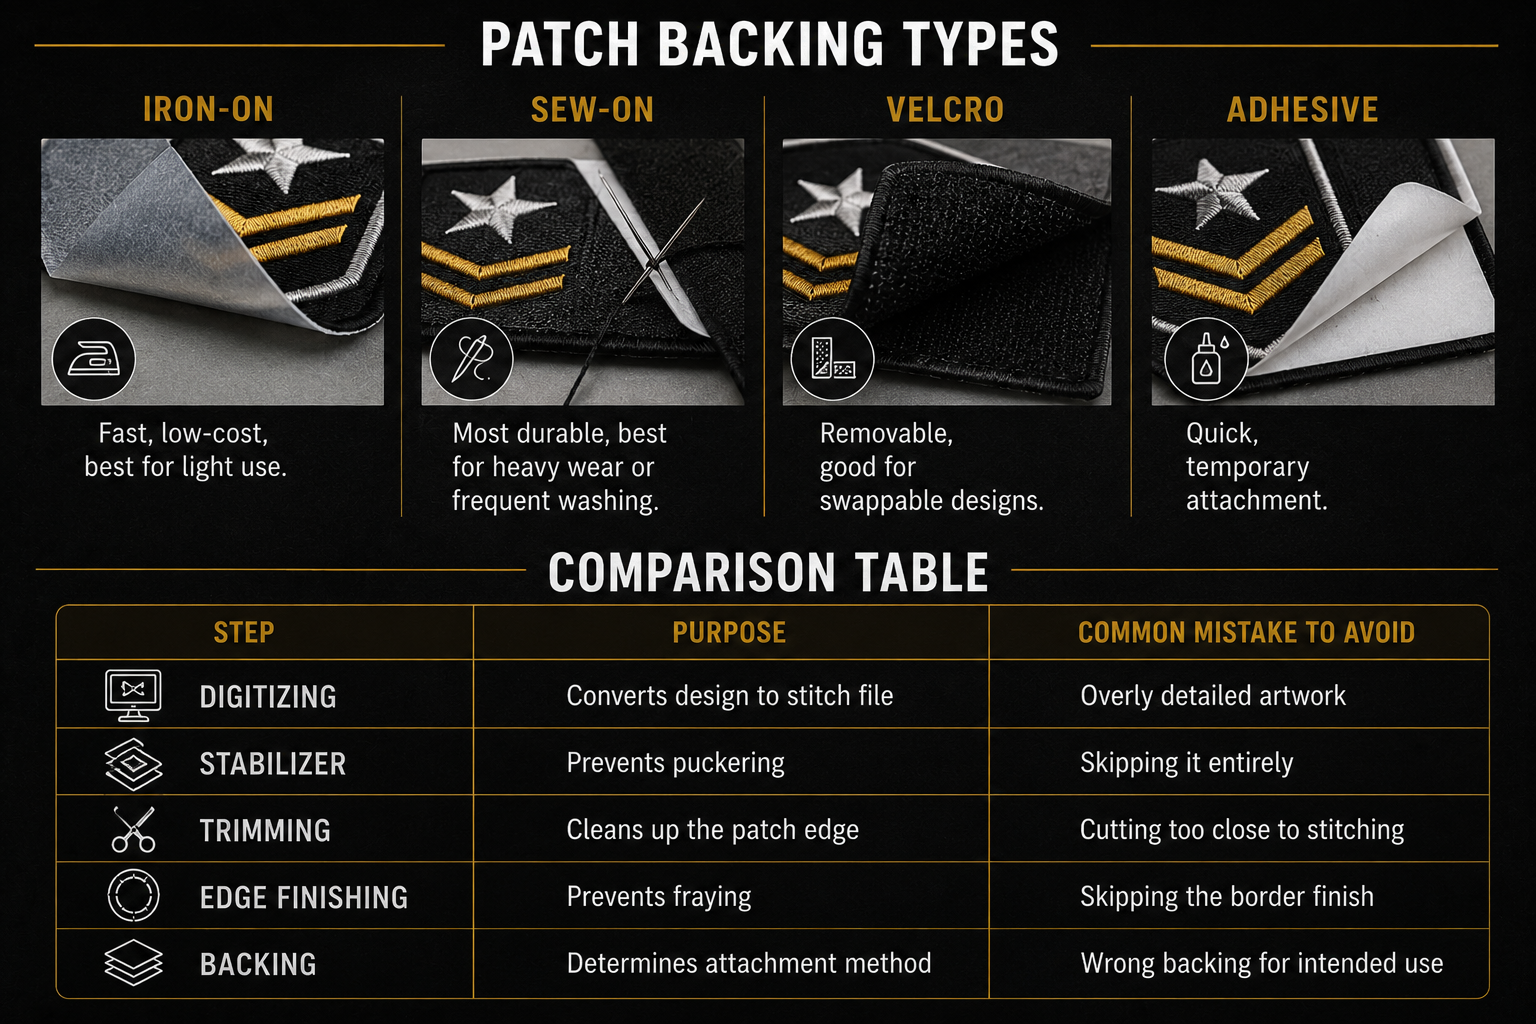
Backing Types
- Iron-on: Fast, low-cost, best for light use.
- Sew-on: Most durable, best for heavy wear or frequent washing.
- Velcro: Removable, good for swappable designs.
- Adhesive: Quick, temporary attachment.
Comparison Table
| Step | Purpose | Common Mistake to Avoid |
|---|---|---|
| Digitizing | Converts design to stitch file | Overly detailed artwork |
| Stabilizer | Prevents puckering | Skipping it entirely |
| Trimming | Cleans up the patch edge | Cutting too close to stitching |
| Edge finishing | Prevents fraying | Skipping the border finish |
| Backing | Determines attachment method | Wrong backing for intended use |
Common Mistakes
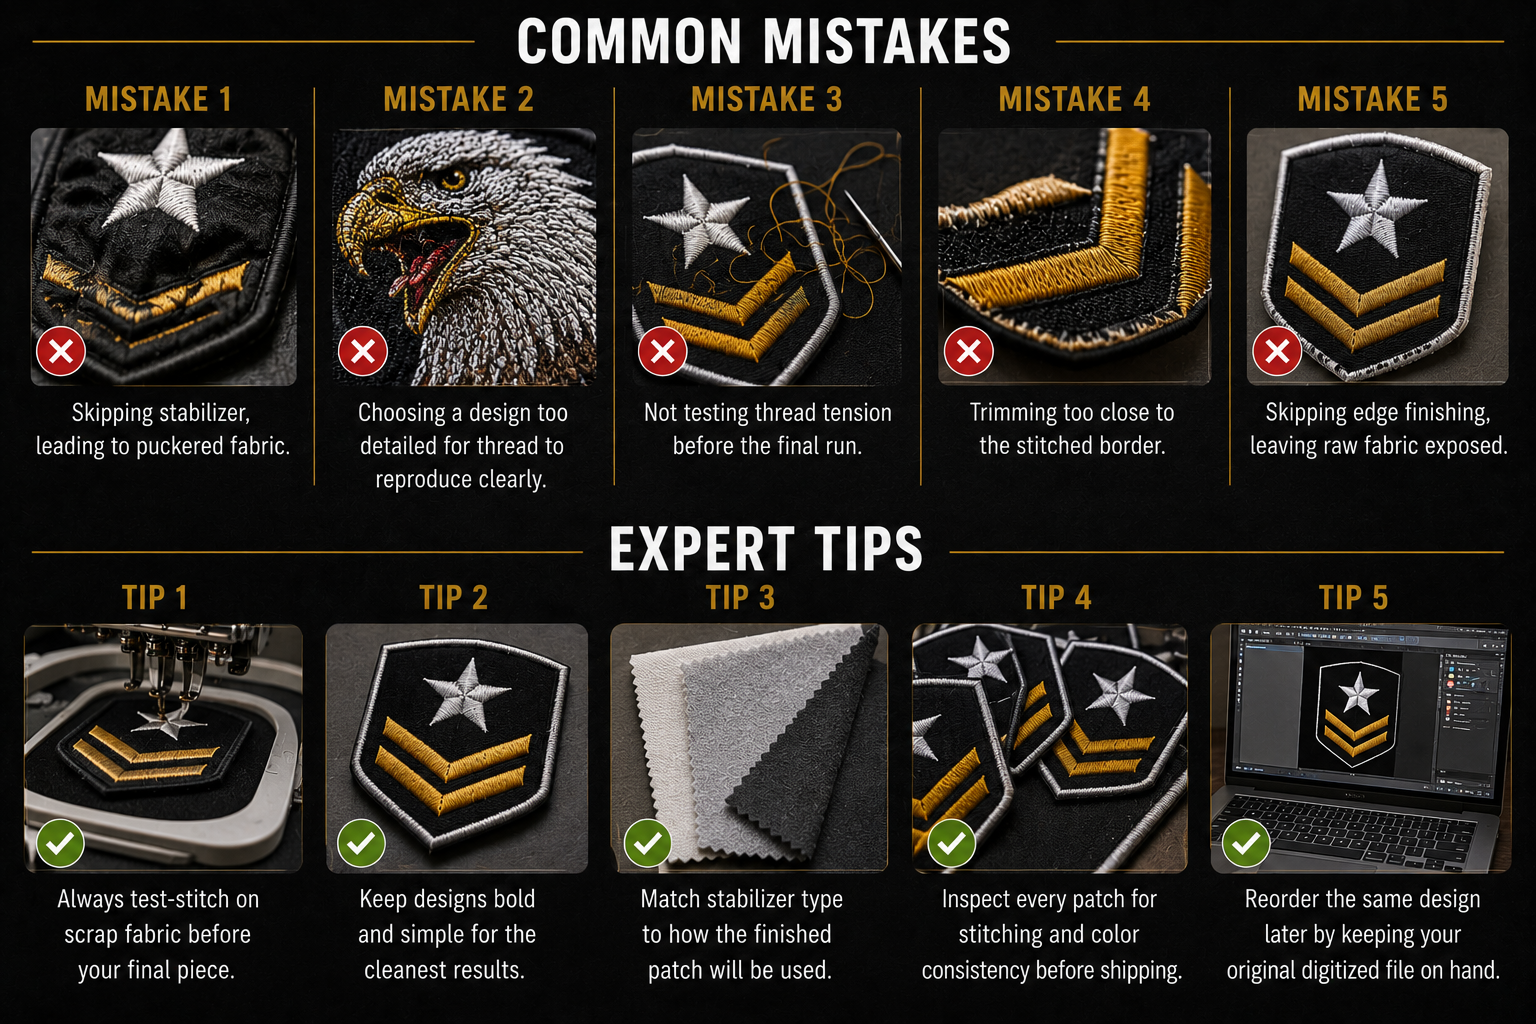
- Mistake 1: Skipping stabilizer, leading to puckered fabric.
- Mistake 2: Choosing a design too detailed for thread to reproduce clearly.
- Mistake 3: Not testing thread tension before the final run.
- Mistake 4: Trimming too close to the stitched border.
- Mistake 5: Skipping edge finishing, leaving raw fabric exposed.
Expert Tips
- Tip 1: Always test-stitch on scrap fabric before your final piece.
- Tip 2: Keep designs bold and simple for the cleanest results.
- Tip 3: Match stabilizer type to how the finished patch will be used.
- Tip 4: Inspect every patch for stitching and color consistency before shipping.
- Tip 5: Reorder the same design later by keeping your original digitized file on hand.
Why Choose Custom Patches 4U
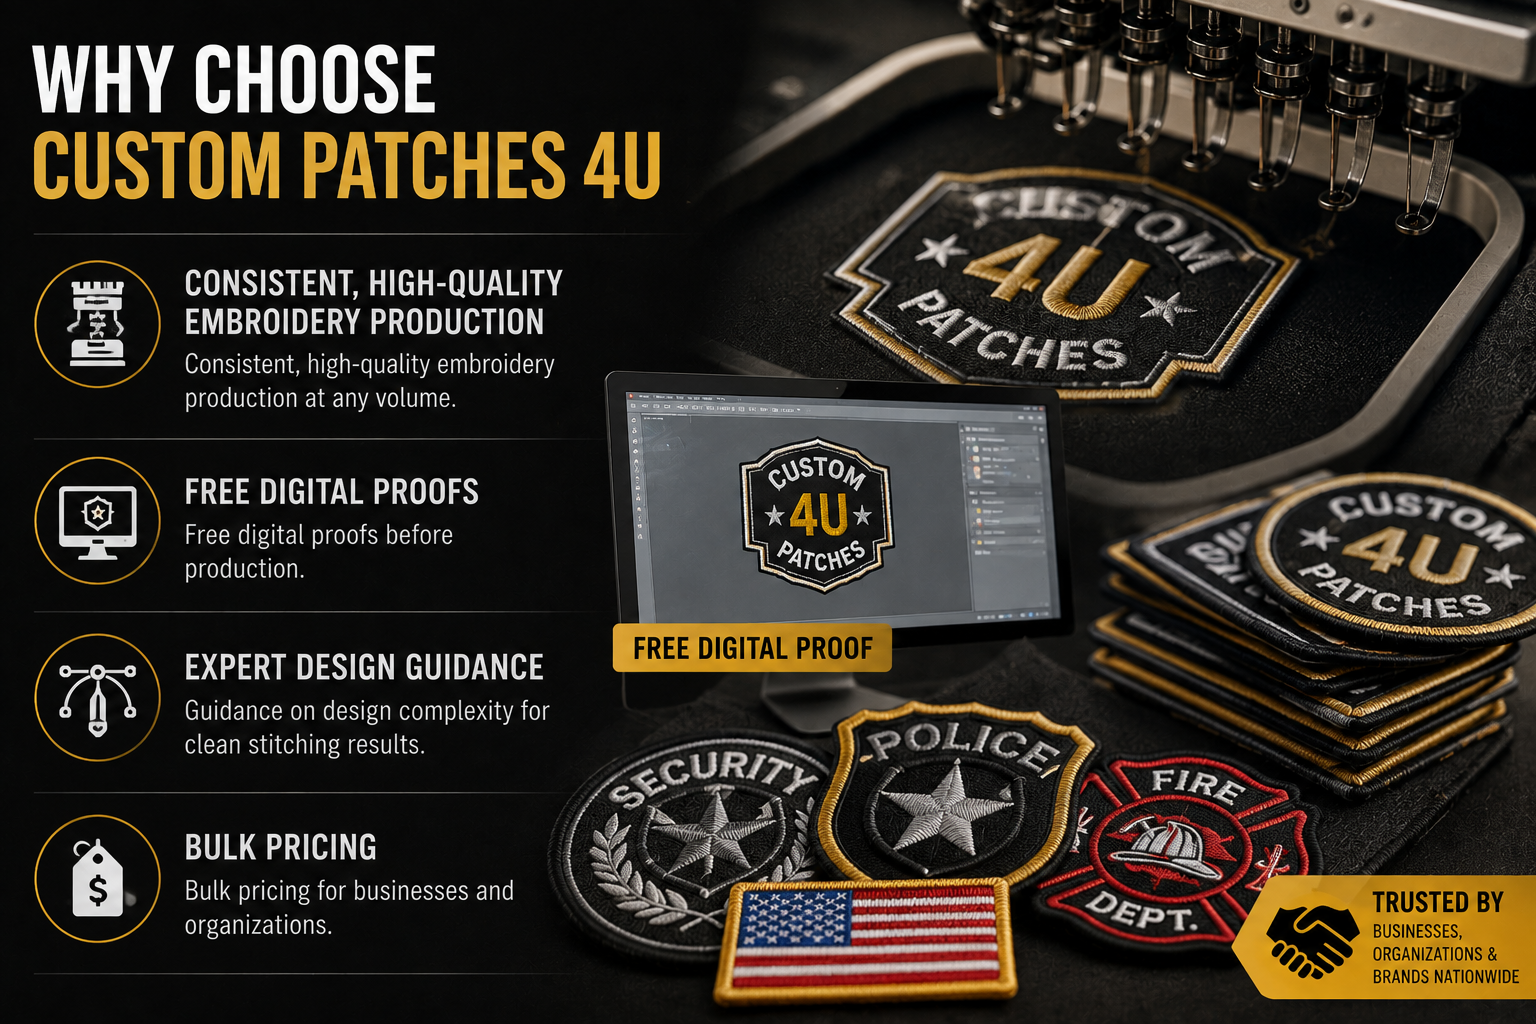
- Consistent, high-quality embroidery production at any volume.
- Free digital proofs before production.
- Guidance on design complexity for clean stitching results.
- Bulk pricing for businesses and organizations.
FAQs
How do you make embroidered patches?
Digitize the design, hoop fabric with stabilizer, stitch it on an embroidery machine, trim and finish the edge, then attach backing.
What do you need to make embroidered patches?
An embroidery machine, digitizing software, fabric backing, stabilizer, thread, a hoop, and backing material.
What are the main steps in embroidered patch manufacturing?
Design preparation, digitizing, hooping, stitching, trimming, edge finishing, backing attachment, and quality inspection.
Why does my patch pucker after stitching?
This usually comes from missing or insufficient stabilizer, or stitch density set too high.
What fabric works best for embroidered patches?
Twill offers a classic, firm feel, while felt gives a softer texture.
What’s the difference between a merrowed border and a satin stitch edge?
A merrowed border is a separate overlock stitch for a rounded edge, while satin stitch seals the border directly on the embroidery machine.
Can complex logos be turned into embroidered patches?
Complex logos often need simplifying first, since fine detail doesn’t stitch cleanly.
How long does it take to manufacture embroidered patches?
This varies by design complexity and order size, though the core process stays the same regardless of quantity.
What backing should I choose for my patches?
Sew-on for heavy wear, iron-on for convenience, Velcro for swappable designs, and adhesive for temporary use.
Do I need to test my design before a full production run?
Yes, a test stitch-out on scrap fabric catches tension, density, or alignment issues before you commit to a full batch.
Start Your Custom Patch Order
Send us your design and we'll walk you through the full manufacturing process, from digitizing to finished patches. Custom Patches 4U offers free digital proofs and bulk pricing to get your order production-ready.